 By Caleb Morgan
Updated November 2026
To set up a kegerator, you need to place the unit on a level surface with room to breathe, connect a CO2 tank through a regulator, attach the keg coupler, and balance the gas pressure so your beer pours clean. Done right, you’ll be pouring a steady, foam-free pint within an afternoon. This guide walks through how to set up a kegerator on a budget, using secondhand parts where it makes sense.
Choose the Right Spot and Prep the Unit
Start by setting the kegerator on a flat, solid floor that can handle the weight of a full keg. Leave at least 2 to 3 inches of clearance at the back and sides so the compressor can vent heat. Keep it out of direct sunlight and away from the oven or radiators, since a warm cabinet makes it work harder and can push beer into foam.
Shopping for one? See our guide: Where to Fill Up CO2 Tank for Kegerator: 5 Best Options (2026).
Once it’s in place, plug it in and let it run for 24 hours before you add any beer. This lets the interior reach its target temperature. Most home brewers aim for 36 to 38°F for lagers and ales, and a basic thermometer inside the cabinet will tell you whether the thermostat is accurate.
Install the CO2 Setup and Regulator
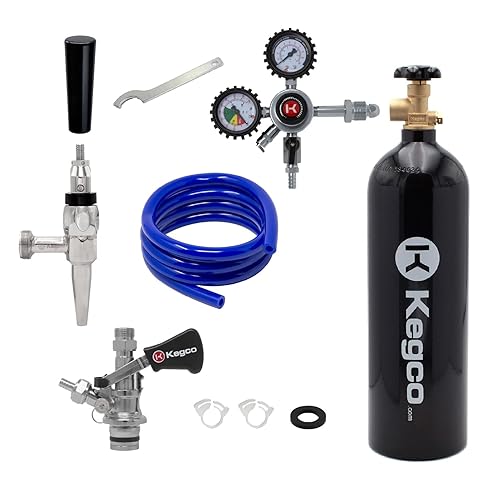
Secure your CO2 tank upright with a strap or chain, either inside the cabinet or in a compartment outside it. Attach a dual-gauge regulator to the tank, then run beverage-grade tubing from the regulator’s outlet to the gas inlet on your keg coupler. Tighten every fitting by hand first, then a quarter turn with a wrench, and check for leaks with soapy water. Bubbles mean a leak to fix before you go further.
Connect the Keg, Tap, and Beer Line
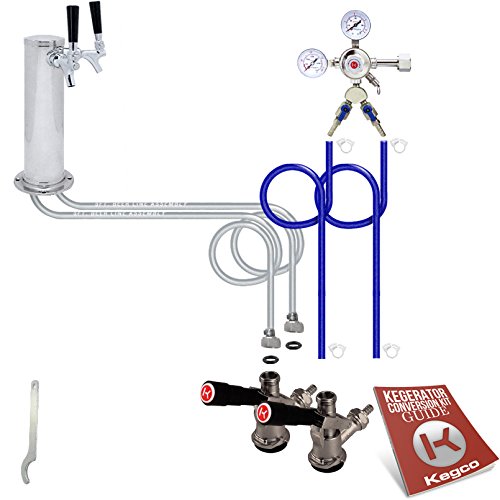
Attach the keg coupler to the keg by pushing it onto the post and turning the handle to lock it. Connect the beer line to the coupler’s liquid outlet, then run it up through the cabinet wall to the faucet shank. Keep the beer line as short as practical, and avoid sharp bends that can trap gas.
Before you pour, set the regulator to a starting pressure for your beer style. A common starting point for ales is around 10 to 12 PSI, and lagers often sit closer to 12 PSI at serving temperature. Let the system sit for a day or two so the beer can absorb the gas.
Balance the Line
Foam at the tap usually means the pressure and line length are out of balance. Standard vinyl beer line runs about 3 feet per 1 PSI of resistance at typical home brewing flow rates. Many builders use 5 to 7 feet of 3/16-inch line for a 10 to 12 PSI serving pressure, then adjust from there. Tighten the regulator in small steps and pour a test glass after each change.
Setup Checklist
- Level, ventilated spot with clearance on all sides
- Unit cooled to 36 to 38°F for 24 hours
- CO2 tank secured upright with a dual-gauge regulator
- Beverage-grade gas and beer lines, leak-checked
- Keg coupler, faucet, and shank installed
- Serving pressure set and balanced line length tested
Common Mistakes to Avoid
- Skipping the 24-hour cooldown before adding beer.
- Using gas-line tubing for beer, which is not food-grade for serving.
- Chasing foam by cranking pressure instead of checking line length and temperature.
- Forgetting to clean lines between kegs.
- Overlooking leaks at the regulator and coupler connections.
Recommended Gear
A dual-gauge regulator is the single most useful part for controlling pressure, since it shows both tank pressure and the pressure going to your keg. A quality line cleaning kit is worth having from day one, because beer lines need regular cleaning to stay tasting right. A stainless tap with a sturdy shank makes pouring smoother and easier to keep clean.
- Dual-gauge CO2 regulator: shows tank and keg pressure so you can dial in serving pressure accurately. View on Amazon
- Beer line cleaning kit: makes it simple to flush lines between kegs and prevent off flavors. View on Amazon
- Stainless draft faucet: a durable tap that cleans easily and holds up to regular use. View on Amazon
FAQ
How long should I wait before pouring after setup?
Give the system at least 24 hours to cool before adding beer, and one to two days after connecting the keg so it can carbonate and settle. Pouring too early often results in foam.
What pressure should I use for my first keg?
Start around 10 to 12 PSI at serving temperature and adjust in small steps. Different beer styles need different pressures, so a CO2 pressure chart helps refine the setting.
Can I use any fridge as a kegerator?
Many people convert a standard refrigerator, but you’ll need to drill a faucet hole and make sure the unit can hold a steady cold temperature. A dedicated freezer-based or fridge-based conversion is a common budget route for home brewers.
Conclusion
Setting up a kegerator comes down to a level, cool spot, a balanced CO2 system, and clean, correctly sized beer lines. Take the process one step at a time, test your pour, and adjust pressure gradually. With a little patience, you’ll be pouring clean pints from your own tap.
Related reading
- How to Hook Up a Kegerator: A Step-by-Step Guide for Beginners
- Northern Brewer Homebrew Kit: How to Set Up and Brew Your First Batch
- Fermenter Blow Off Tube: How to Set One Up Without Messes (Step-by-Step)
- Wine Fridge Kegerator Combo: How to Build One for Your Home Bar (2026)
Ready to choose one?
About Caleb Morgan
Caleb Morgan is part of our editorial team and reviews and edits our home brewing guides, checking product details against manufacturer specifications and owner feedback.