 By Caleb Morgan
Updated November 2026
The big mouth bubbler 6.5 gallon glass fermenter is a wide-mouth glass vessel built for five-gallon batches, and it gives you a clear view of the fermentation without opening the lid. In this guide you will learn how to prepare the fermenter, sanitize it, fill it, seal it with the airlock, and monitor it through primary fermentation. You will also see the mistakes that trip up most first-time users.
What the Big Mouth Bubbler Is and Why Homebrewers Use It
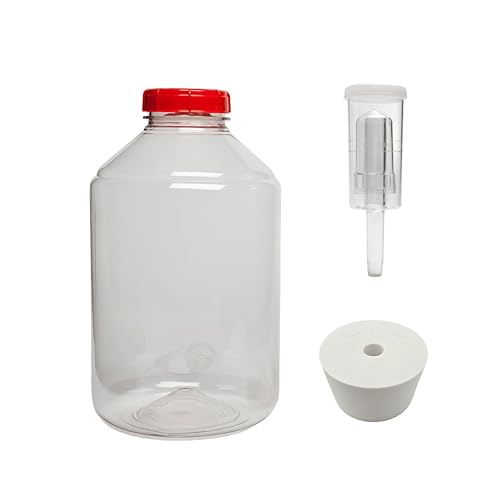
The Big Mouth Bubbler is a wide-mouth glass fermenter sold in a 6.5 gallon capacity. The wide opening makes it easier to add dry hops, fruit, or oak, and to reach the bottom with a spoon or sanitized paddle. Most owners pick it because the glass does not scratch or hold onto odors the way some plastic does, and because it is easy to see the krausen and fermentation activity.
Shopping for one? See our guide: Little Big Mouth Bubbler Glass Fermenter Compared: 8 Options for Homebrewers.
Keep in mind that the 6.5 gallon rating is the total capacity. For a five-gallon batch you should leave headspace, so most brewers fill to about five gallons and keep the rest for foam. If you are weighing the trade-offs between materials, the article Plastic vs Glass Fermenter: Which Is Better for Your Brews? covers that comparison in more depth.
What You Need Before Brew Day
Gather everything before you start the wort. Running out of sanitizer or a stopper halfway through a brew is a common source of contamination.
- The big mouth bubbler 6.5 gallon glass fermenter with lid and gasket
- A drilled rubber stopper or bung that fits the lid opening, with a three-piece airlock
- No-rinse sanitizer such as StarSan or an equivalent acid-based product
- A sanitized funnel, spoon and siphon or transfer hose
- A hydrometer and sample jar for gravity readings
- A thermometer strip or digital probe to track fermentation temperature
- Yeast, rehydrated or pitched according to the package directions
- A way to control temperature, such as a closet, chest freezer with controller, or water bath
Step-by-Step: Setting Up the Fermenter
Step 1: Inspect the Glass and Gasket
Before you use the fermenter for the first time, look closely at the rim and the lid gasket. Check for chips in the glass around the mouth, since a chip can trap bacteria or cause a poor seal. Confirm the gasket sits flat and is not cracked. Replace it if it looks dry or stretched. Manufacturers generally recommend handling the glass gently and avoiding sudden temperature shifts, which can crack it.
Step 2: Clean and Sanitize
Wash the vessel with warm water and a mild unscented cleaner, then rinse thoroughly. Glass shows residue more clearly than plastic, so pay attention to the shoulder and the inside of the lid. Mix your sanitizer according to the label, fill the fermenter with a few gallons of solution, and swirl it so it contacts every surface. Let it sit for the contact time listed on the product, then drain. Do not rinse with tap water afterward if you use a no-rinse sanitizer, since that can reintroduce microbes.
Step 3: Install the Airlock
Fit the drilled stopper into the lid, then insert the airlock. Fill the airlock to the line with water or sanitizer. A few drops of sanitizer in the water can help keep things clean. Seal the lid onto the fermenter, making sure the gasket is seated evenly and the clamps or latches close fully. Check that the lid is tight before you move on.
Step-by-Step: Brew Day Transfer and Pitching
Step 4: Chill and Transfer the Wort
Cool your wort to the yeast’s recommended pitching temperature, which is often in the range of 64–72°F for ales, depending on the strain. Transfer the wort through a sanitized funnel or hose, aerating as you go by splashing or stirring, or by using an oxygen wand if you have one. Aim to leave some of the trub and hop debris behind in the kettle.
Step 5: Pitch the Yeast and Seal
Add the yeast once the wort is at temperature. Swirl gently to mix, then reseat the lid and confirm the airlock is bubbling freely within a day or two. Record the date, yeast strain, original gravity and target temperature on a label or brew log.
Step 6: Control Fermentation Temperature
Set your temperature controller or choose a spot with stable conditions. Ale yeasts commonly do best in the mid-60s to low 70s Fahrenheit. Fermentation generates its own heat, so the internal temperature can run several degrees above ambient. Keep the vessel away from direct sunlight, which can heat the glass unevenly and degrade flavor.
Monitoring Fermentation
The main advantage of the big mouth bubbler is visibility. You can watch the krausen form, peak and fall. Use these markers to decide what is happening:
| Stage | What You May See | What to Do |
|---|---|---|
| Lag phase (first 12–48 hours) | Little or no airlock activity | Wait and keep the temperature steady |
| Active fermentation (days 2–5) | Vigorous bubbling and a foamy krausen | Leave it alone; avoid opening the lid |
| Slowing (days 5–10) | Bubbling slows and krausen falls | Take a gravity reading to confirm progress |
| Completion | Stable gravity over two or three days | Proceed to conditioning or packaging |
Use a hydrometer reading taken from a sanitized sample rather than relying on airlock bubbles alone. Airlock activity can stop before fermentation is actually complete, since pressure changes and leaks affect it.
Common Mistakes to Avoid
- Overfilling the vessel. Leave headspace for krausen. Filling to the brim often leads to blowoff through the airlock.
- Opening the lid too often. Each opening risks contamination and lets oxygen in after active fermentation.
- Skipping the gasket check. A worn gasket is a frequent cause of leaks and off flavors.
- Rinsing after no-rinse sanitizer. This can add microbes you were trying to remove.
- Letting temperature swing. Large daily changes can produce fusel alcohols and other off notes.
- Moving the glass with a full load. A full five-gallon batch is very heavy. Lift from the base, use a stable cart, and handle with both hands.
Tips for Getting Better Results
- Use a fermentation chamber or insulated tub to hold temperature steady.
- Write the gravity readings in a notebook so you can see the trend.
- Label the lid with the batch name and date so you do not confuse batches stored side by side.
- If you dry hop, add the hops during the active fermentation phase or after it finishes, following your recipe’s timing.
- Cleaning the airlock and lid right after the brew day makes the next session much easier.
Recommended gear
A few supporting items make the big mouth bubbler easier to use. These are general brewing tools that fit this type of fermenter.
- Three-piece airlock. A standard airlock lets you monitor gas release without letting air in. View on Amazon
- Fermentation temperature controller. A plug-in controller paired with a chest freezer or heating pad keeps the batch in its target range. View on Amazon
- Digital hydrometer or floating hydrometer. Gravity readings are the most reliable way to confirm fermentation is finished. View on Amazon
- No-rinse sanitizer. A quick sanitizing step before each brew protects the batch from contamination. View on Amazon
If you are still comparing sizes or designs, the articles Little Big Mouth Bubbler Glass Fermenter Compared: 8 Options for Homebrewers and 9 Best Wide Mouth Glass Fermenters for Homebrewing (2026) offer side-by-side context. For plastic alternatives, see 7 Best Big Mouth Bubbler 6.5 Gallon Plastic Fermenter Options (2026).
FAQ
Can I use the big mouth bubbler 6.5 gallon glass fermenter for five-gallon batches?
Yes. Five-gallon batches are the typical use for this size, and the extra capacity leaves room for krausen and foam.
How do I know when fermentation is finished?
Take gravity readings on two or three consecutive days. If the reading holds steady, fermentation is usually complete. Airlock activity alone is not a reliable indicator.
Do I need to sanitize the lid and gasket?
Yes. Anything that touches the wort should be sanitized, including the lid, gasket, stopper and airlock.
Is glass better than plastic for this fermenter?
Glass does not scratch as easily and resists odor absorption, and you can see the fermentation clearly. It is also heavier and more fragile, so handle it with care.
Why is my airlock not bubbling?
The seal may be loose, the stopper may not fit well, or fermentation may not have started yet. Check the gasket and clamps first, then confirm the temperature is in the right range. Gravity readings will tell you whether fermentation is actually occurring.
What temperature should I ferment at?
Target the temperature listed for your yeast strain. Many ale yeasts perform well between the mid-60s and low 70s Fahrenheit, but always follow the manufacturer’s specifications for the strain you use.
How do I clean the fermenter after use?
Rinse it soon after emptying to prevent dried residue, then wash with warm water and a mild cleaner. Sanitize before the next brew. Store the lid loosely covered to keep dust out.
Conclusion
The big mouth bubbler 6.5 gallon glass fermenter gives you a large, visible, easy-to-clean vessel for five-gallon batches. Inspect the gasket, sanitize carefully, leave headspace, and keep the temperature steady. Taking gravity readings instead of relying on airlock activity will help you know exactly when your beer is ready.
Related reading
- 7 Best Big Mouth Bubbler 6.5 Gallon Plastic Fermenter Options (2026)
- Big Mouth Bubbler Fermenter: Setup, Use and Common Mistakes
- 9 Best Wide Mouth Glass Fermenters for Homebrewing (2026)
- 6 Best 5 Gallon Glass Fermenters for Homebrewers: Buyer's Guide
- 6 Best 2 Gallon Fermenter Glass Jars for Small-Batch Brewing (2026)
- 4 Best 1 Gallon Glass Wine Fermenter Options for Home Winemakers (2026)
Ready to choose one?
About Caleb Morgan
Caleb Morgan is part of our editorial team and reviews and edits our home brewing guides, checking product details against manufacturer specifications and owner feedback.